Your Workbench Is Holding You Back: How a Real Pit Station Changes Everything About Vintage RC Builds
There's a specific kind of frustration that every vintage RC restorer knows. You've got a disassembled Tamiya Hornet spread across a folding table, a stripped screw somewhere in the carpet, and you just knocked over a bottle of diff fluid because there wasn't a clean inch of surface left to set it down. Sound familiar?
Here's the thing: that chaos isn't just annoying. It's actually slowing down your progress, causing you to miss problems that should be obvious, and quietly eroding the kind of careful attention that good restoration work demands. The fix isn't more patience or better lighting from a random lamp you dragged over. The fix is a real, dedicated pit station — and building one is one of the smartest investments you can make in this hobby.
Why "Just a Shelf" Isn't Cutting It
A lot of guys in the vintage RC community treat their workspace as an afterthought. The cars get the love; the bench gets whatever's left over. But think about what you're actually asking yourself to do at that bench. You're diagnosing mechanical issues in components that are sometimes 30 or 40 years old. You're handling tiny screws, fragile plastic tabs, and delicate wiring that doesn't have a replacement sitting on a shelf at your local hobby shop. One bad move — one moment of reaching across a cluttered surface — and you've snapped something irreplaceable.
A dedicated work station forces a different mindset. When everything has a place and that place makes logical sense, you stop burning mental energy on the environment and start focusing it entirely on the car in front of you. That's not a small shift. That's the difference between a builder who's reacting to problems and one who's actually anticipating them.
Designing Your Layout: Think Like a Real Pit Crew
The name "pit station" isn't just a fun label — it's a useful mental framework. Real racing pit crews design their setups around workflow: the tools you reach for first are closest, the ones you use occasionally live a step away, and everything else is stored out of the way but still accessible. Apply that same logic to your vintage RC bench.
Start with a dedicated surface at a comfortable working height. A lot of hobbyists underestimate how much this matters. Hunching over a low table for two hours will kill your focus before it kills your back. Ideally, your bench should let you work while seated or standing without straining. A simple workbench from a hardware store — something like a Husky or Seville Classics unit from Home Depot — gives you a solid starting point for under $200.
Divide your surface into zones. One zone is your active work area — where the car or component being worked on lives. Keep this zone clear except for what you're actively using. Another zone is your immediate tool zone — the screwdrivers, hex drivers, pliers, and tweezers you reach for constantly. A third zone handles chemicals and lubricants: diff fluid, CA glue, thread lock, motor spray. Keeping these separated prevents accidents and makes you faster.
Lighting: This One Is Non-Negotiable
If you're not running dedicated task lighting over your work surface, you are missing things. Full stop. The stripped hex socket you didn't notice until you've already rounded it further, the hairline crack in a vintage chassis rail, the corrosion on a motor contact that looks fine in dim light — all of these become obvious under proper illumination.
A good LED workbench light with a daylight color temperature (around 5000K) is the standard recommendation, and for good reason. It renders colors accurately, which matters when you're trying to match original paint or assess the condition of aging plastics. A swing-arm style light gives you the flexibility to direct it exactly where you need it without shadows. Brands like TaoTronics and BenQ make solid options in the $40–$80 range that won't break the bank.
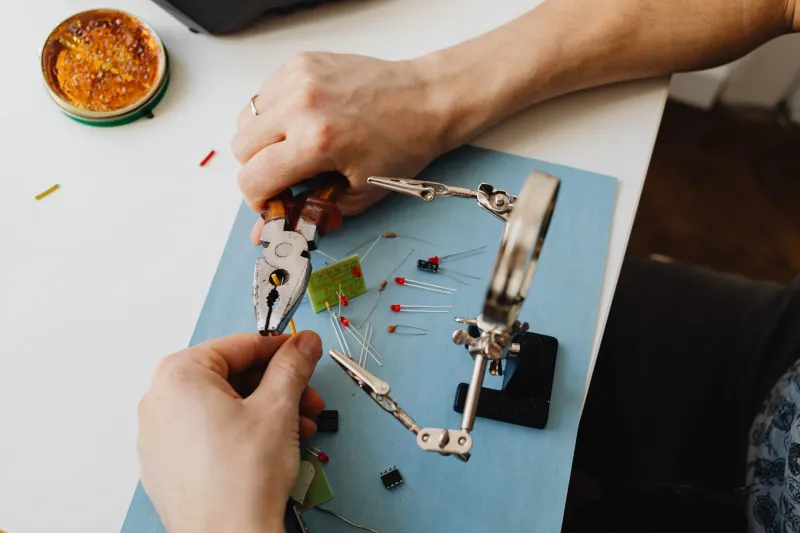
For detail work — inspecting gear mesh, checking bearing seats, examining tiny electronics — a magnifying glass on a flex arm is worth adding. Once you've used one, you'll wonder how you survived without it.
Tool Placement: Reach Time Is Wasted Time
Every second you spend hunting for a tool is a second you're not working on the car. More importantly, it's a second where your hands are off the job and something can shift, roll, or fall. Organize your tools so that the ones you use most are within arm's reach without moving your body.
A pegboard mounted above the bench is the classic solution, and it's classic because it works. Label the outlines of each tool so you can see immediately what's missing. Magnetic tool strips work well for metal tools and keep screwdrivers and hex keys lined up and visible. Small parts bins — the kind with labeled drawers — are worth every penny for sorting hardware by size and type. If you've ever dug through a bag of mixed screws looking for one specific M3 cap head, you understand why.
Keep a dedicated small-parts tray on your active work surface. A simple silicone parts tray with compartments (available on Amazon for about $10) prevents screws and pins from rolling off the bench while you're mid-disassembly. This single addition will save you more grief than almost anything else on this list.
Catching Problems Before They Become Disasters
Here's something experienced restorers figure out over time: a well-organized workspace makes you a better diagnostician. When your bench is clean and your workflow is systematic, you naturally develop habits around inspection. You check each component as you remove it. You line parts up in disassembly order. You notice when something doesn't look right because there's nothing else competing for your attention.
Compare that to wrenching in chaos. When you're fighting your environment, your brain is constantly context-switching — managing the mess rather than reading the car. Small problems get missed. Stripped threads go unnoticed until they're stripped worse. Worn gears that needed replacing get reinstalled because you were moving too fast to stop and look carefully.
A real pit station slows you down in the best possible way. It creates the conditions for the kind of careful, methodical work that vintage RC restoration actually requires.
Starting Small, Building Up
You don't need to spend a fortune to get this right. Start with a solid surface, good lighting, and a basic organizational system. Add to it as you identify what your specific workflow needs. Maybe you run a lot of nitro cars and need a dedicated area for fuel handling. Maybe you do a lot of bodywork and need a spray zone. Build toward that over time.
The point isn't perfection on day one. The point is intentionality — treating your workspace as seriously as you treat the cars that live there. When you do that, everything about the hobby gets better: the builds go faster, the mistakes get fewer, and the whole experience becomes less like frustrated tinkering and more like the real craft it actually is.